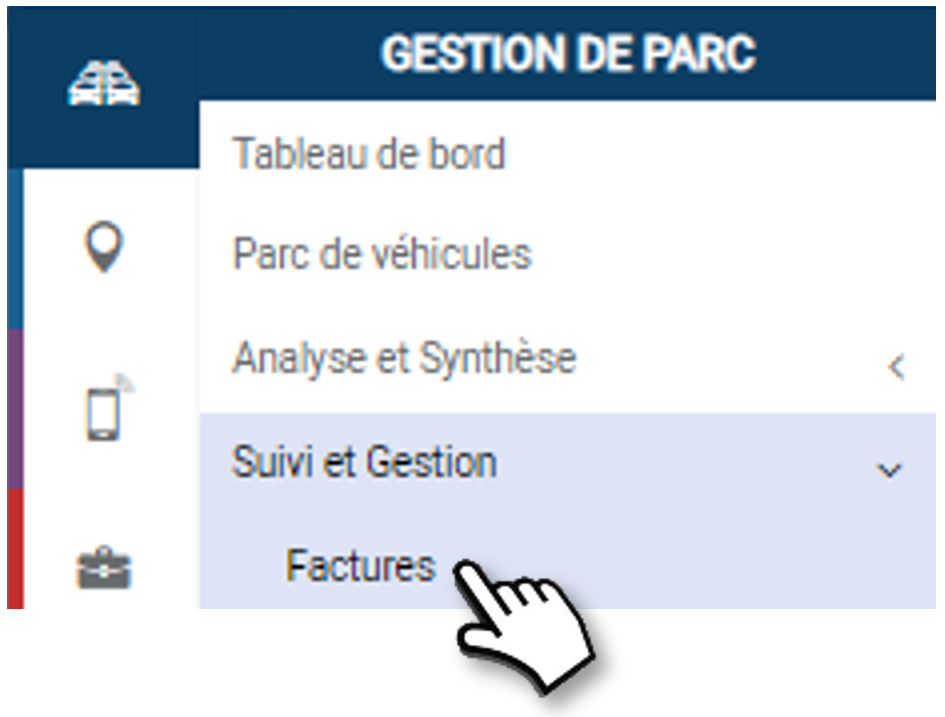
Displaying invoices
By default, the application displays invoices on a rolling month for all suppliers.
You can filter the display by:
1. Invoice date: select a period from date to date.
2. Posting date: select a period from date to date.
3. Supplier
4. Click on APPLY.
5. The results are displayed in the list below.
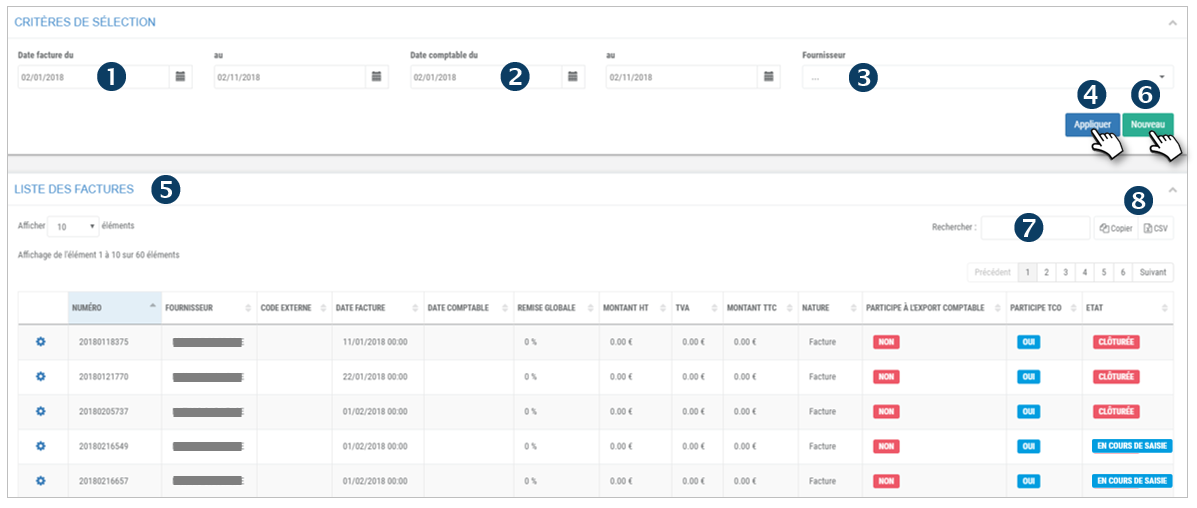
Legend:
Participates in the accounting export : YES/NO : will be taken into account (or not) for the export in your accounting software.
Participation TCO : YES/NO : invoice included in the TCO calculation and analysis. The invoice must be closed to be taken into account.
Status CLOSED : the invoice is complete and exported in the accounting software and can be taken into account in the TCO if the option is activated.
Status IN PROGRESS: the invoice is not yet closed (manual action).
6. Click on NEW to enter a new invoice
7. You can search by keyword by entering the beginning of the word you are looking for.
8. You can copy the content of the table or export it in .csv format.
See the details of an invoice or a credit note
1. Double-click on a line or click on the pictogram  and then

2. The invoice details are displayed with 2 tabs: HEADER and LINES
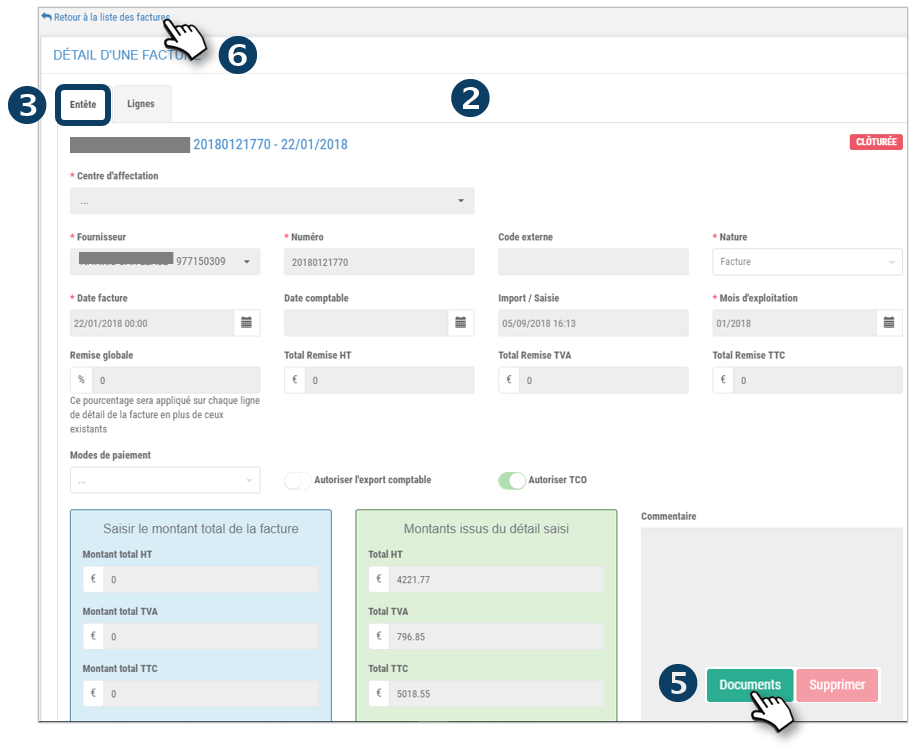
3. The INVOICE tab is the summary of the invoice with the total amount
4. The LINES tab details the invoice with all the billing lines
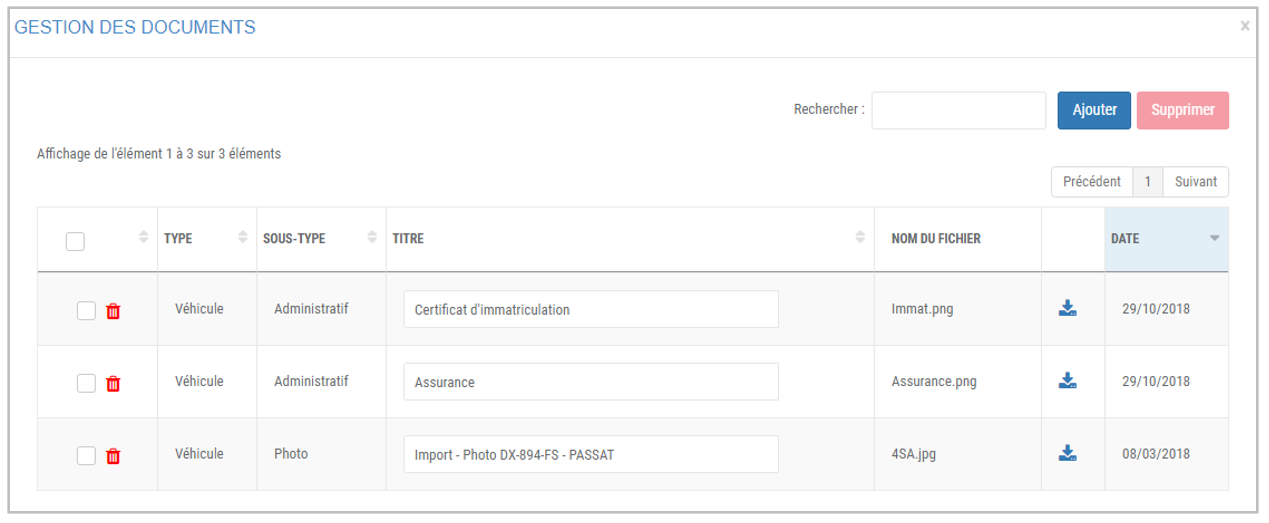
5. Click on DOCUMENTS to access the original invoice if it was scanned and uploaded into the application.
6. Click on “Back to invoice list” to return to the main page
Enter a new invoice/credit note
Some information is required (marked * or ** ) to SAVE an invoice or a credit note.
The 1st tab of the input mask concerns the invoice header, i.e. the general information, the terms and the total amounts of the invoice. The details of the invoice lines are processed in the 2nd tab (see next page).
Enter the fields of the form:
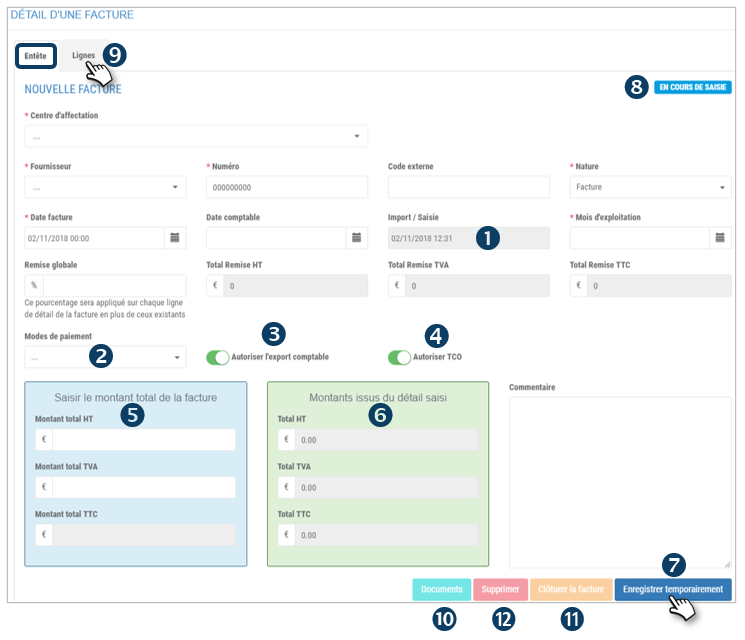
1. Import/Enter: the current date is displayed automatically. It cannot be modified.
2. Payment methods: select from the menu: check, transfer, cash, credit card…
3. Authorize the accounting export : drag the cursor to include this invoice in the export to your accounting software
4. Authorize TCO : drag the cursor to include this invoice in the TCO calculation and analysis (see TCO section)
5. Enter the total amount: enter the total amounts of the invoice
6. Amount from detail entry: here the total of the lines entered in the next tab is displayed so that you can compare the accuracy of the amounts.
7. Click on SAVE TEMPORARILY.
8. The status will remain IN PROGRESS.
9. Click on the LINES tab to enter the invoice details.
10. Click on DOCUMENTS to download the original invoice for future reference (EDM – Electronic Document Management)
11. Click to CLOSE this invoice. This action is only possible if the total amount (BLUE) is equal to the amounts from the detail (GREEN)
12. Click to DELETE this invoice permanently.
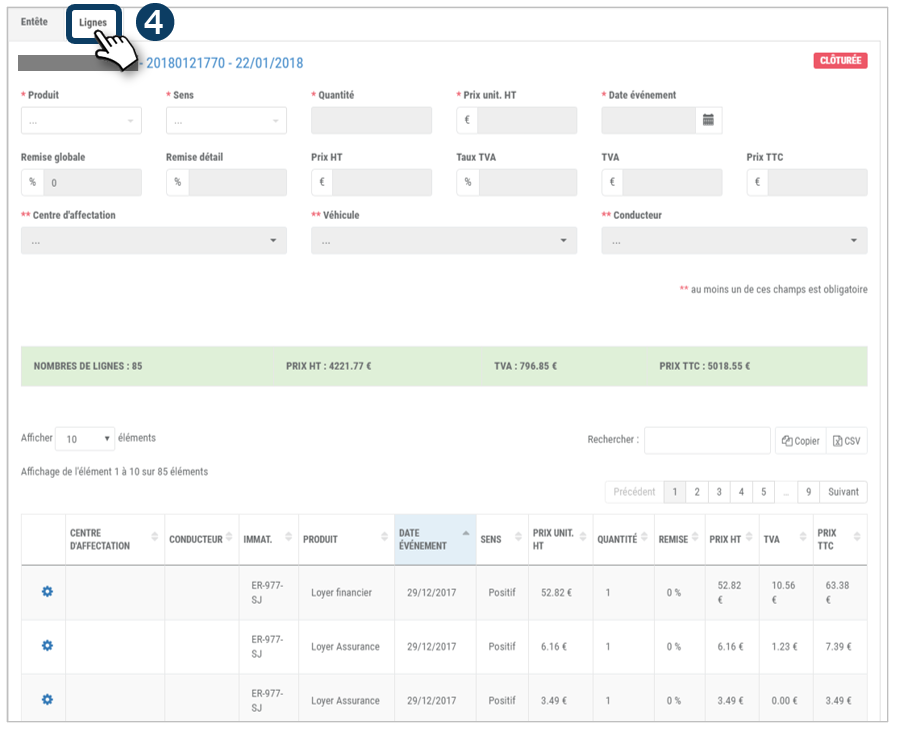
Entering a detail line
Enter the invoice details here, i.e. all the lines of the invoice.
Enter the fields of the form:
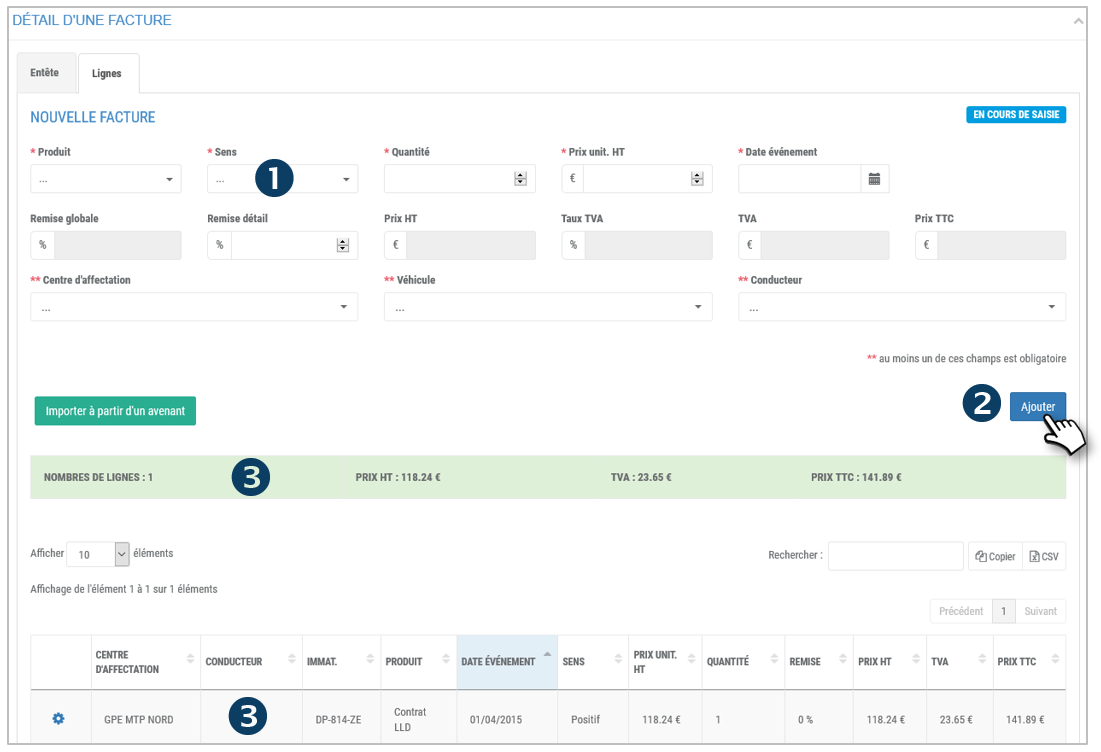
1. Meaning: positive or negative
2. Click on ADD.
3. The line is added and appears in the table and in the TOTAL lines (highlighted in green)
Repeat as many times as necessary to enter all the lines of the invoice.
Import from an addendum
It is also possible to import the lines of an invoice from an addendum already SAVE.
1. Click on the IMPORT button:

2. In the window that opens, select the addendum concerned

3. Click on SAVE
4. The line is added and appears in the table and in the TOTAL lines (highlighted in green)