Assignment of a vehicle to a driver
Your control panel
To access the assignments, access the menu SETTINGS > Collaborators > Vehicle Assignment.

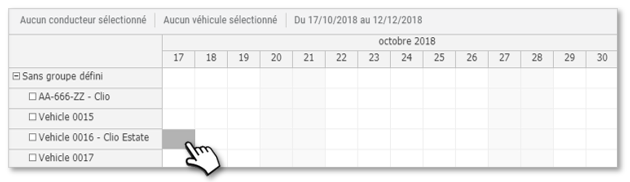
1. The assignment table is displayed with all vehicles in your fleet and the status of the assignments. Only assigned vehicles are displayed in the table.
2. An assignment is correct when the vehicle characteristics are complete (make, model, registration) and the driver’s first and last name are present.

3. Where the driver’s first and last name do not appear: the vehicle is assigned virtually but without a designated driver.
4. Click here to view the assignments in calendar form.
Three events create an assignment:
1. A manual assignment by the Manager or Administrator
2. A carsharing vehicle pick-up
3. Identification by badge or dallas key
Create an initial assignment
There are two ways to access the assignment creation window:
‘New allocation’ button
Click on the line of the vehicle concerned
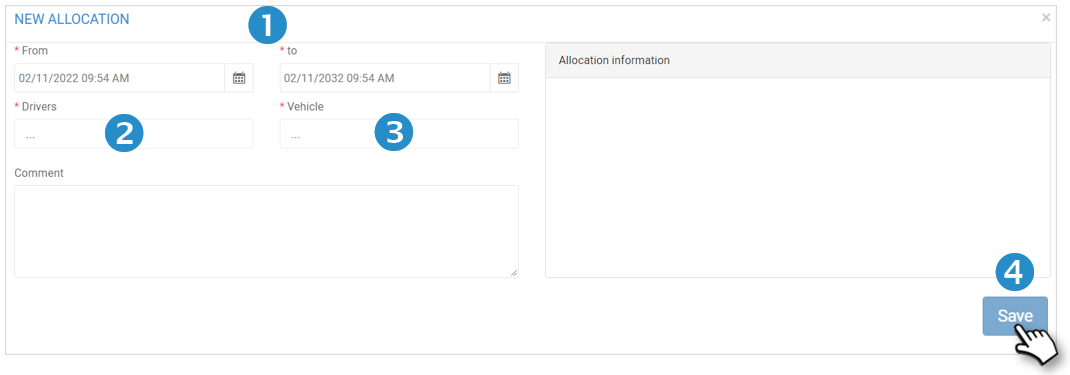
The assignment window will open and you will select :
1. The assignment period
2. The driver
3. The Vehicle. This will be automatically selected if you have clicked on the relevant line.
4. Do not forget to SAVE.
If the driver is already assigned to another vehicle, an error message will be displayed. You must first delete the assignment for this driver to make him available in the list (see next page).

The new assignment appears in the list and calendar.

Delete an existing assignment
There are 2 ways to delete an assignment:
Select Delete in the pictogram option
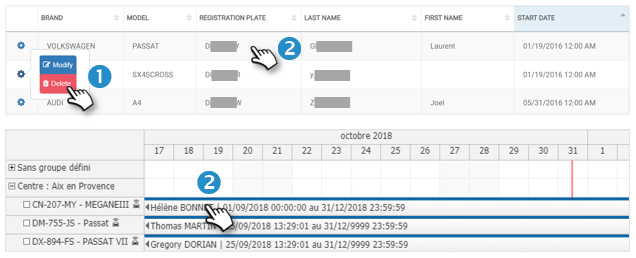
Click on the line of the vehicle concerned and click on DELETE in the window that has just opened.
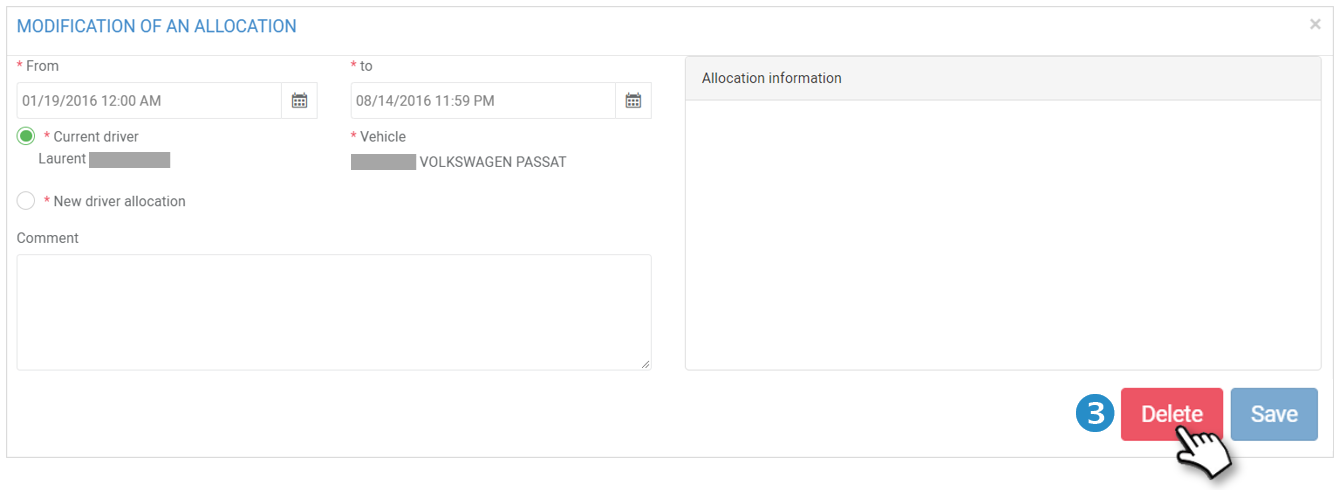
The assignment no longer appears in the table or list.
Modifying an existing assignment
Change only the dates of an assignment
Open the editing window.
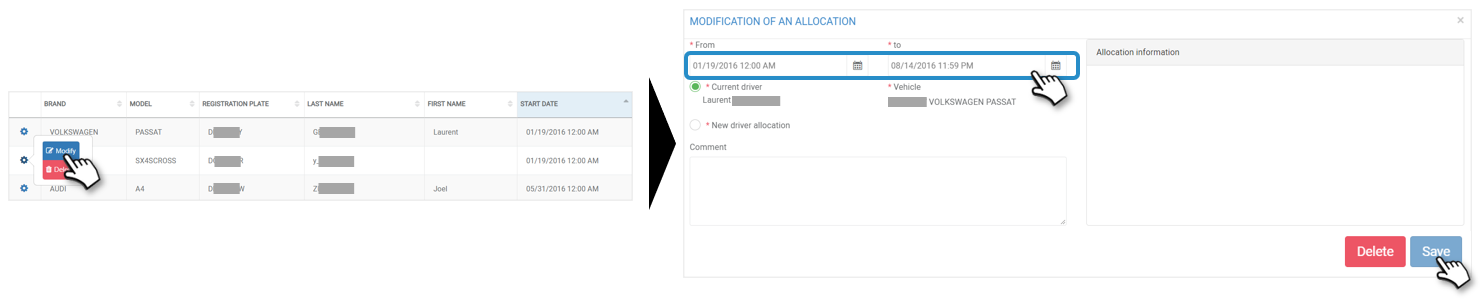
Change the date(s). If an overlap exists for this driver, an error message will be displayed. You will not be able to SAVE the change until the dates are correct.
SAVE. The modified assignment appears in the table and the list.
Change the driver of an assignment
Open the edit window by clicking on the gear icon then Edit or by clicking on the line.

Click on ‘New driver assignment’ and select the new driver.
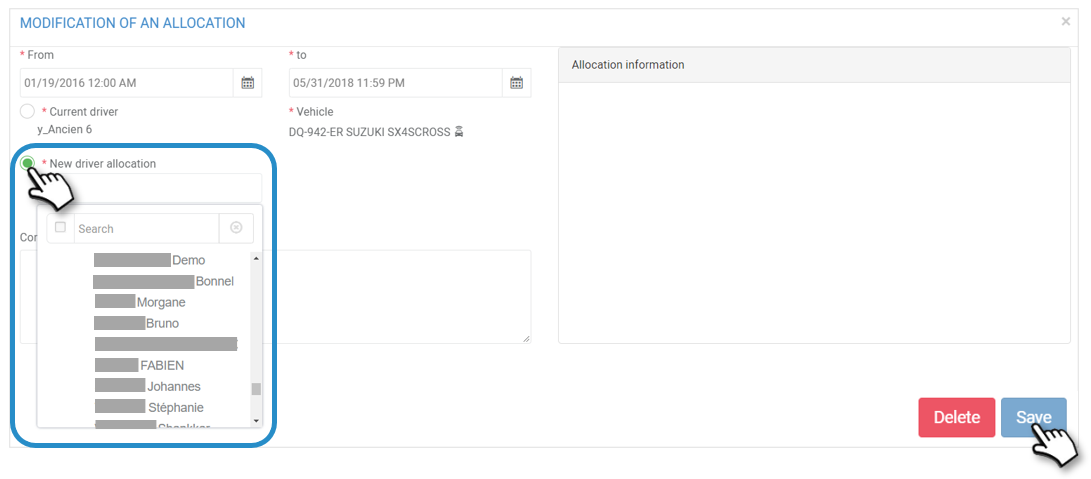
If an overlap exists for this driver, an error message will be displayed. You will not be able to SAVE the change until the availability of a driver or the vehicle is correct.
SAVE. The 2 assignments will appear in the table and the list: 1. the previous modified assignment which will stop at the date when the new driver will start 2. the new assignment with the new driver.
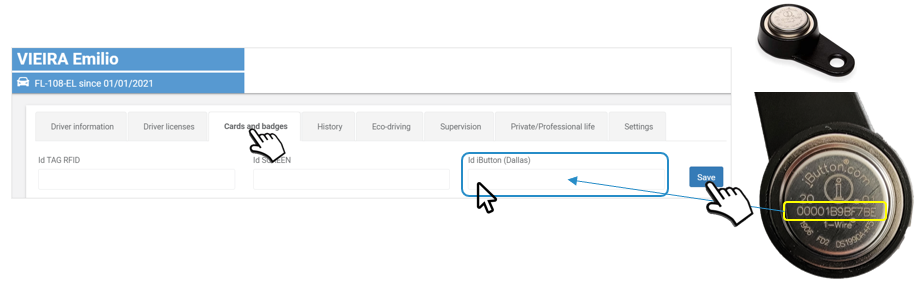
Assignment by ID key/badge
Before using the identification keys, the serial numbers of the keys must be SAVE in the staff records:
- Open the relevant driver record
- Click on the “Cards and badges” tab
- Enter the identification number engraved on the key: 12 characters
- SAVE
- Proceed in the same way for all employees